The Birth of Xiis — A Guide to Font Creation
Author: George Marques
MS Date: 01-08-2016
FL Date: 02-01-2016
FL Number: FL-000035-00
Citation: Marques, George. 2016. » The Birth of Xiis — A
Guide to Font Creation.» FL-000035-00, Fiat
Lingua,
February 2016.
Copyright: © 2016 George Marques. This work is licensed
under a Creative Commons Attribution-
NonCommercial-NoDerivs 3.0 Unported License.
http://creativecommons.org/licenses/by-nc-nd/3.0/
Fiat Lingua is produced and maintained by the Language Creation Society (LCS). For more information
about the LCS, visit http://www.conlang.org/
The Birth of Xiis — A Guide to Font Creation
by George Marques
1. Introduction
When I decided to construct my own writing system (or a conscript, for short), I didn’t know how
difficult it would be to actually develop a computer font for it. If I had been designing a standard
alphabet, I would have far fewer difficulties, but, inspired by Hangul, I followed a different path.
So, to help other people who might try to create similar systems, I’ll try to describe my journey in
this endeavor.
This is not a tutorial, because it doesn’t provide step-by-step directions. Instead, it is a guide that will
explain the general process I used to create Xiis and what each function does (especially Lookup
Tables, something I found really difficult to understand). The article walks you through the process as if
you are creating a font like Xiis. You can then take those steps and use them to create your own fonts.
To view the description of Xiis, itself, along with a link to the generated font file, you can check the
document at http://georgemarques.com.br/xiis.pdf.
2. Software
I used two programs to create the font for Xiis: Inkscape, a vector graphics editor, and FontForge, an
outline font editor. Both are free open source programs, so you only have to use your internet
connection and spend bandwidth to download them. The only caveat is that FontForge has
been known to have a troublesome install process on Windows, though there are unofficial
pre-built installer packages to that operating system. One such package can be found at
http://www.mpetroff.net/software/fontforge-windows/.
There’s also Graphite, a scripting language to help create complex features in fonts. Even though it
looks like a programming language, I found it easier to understand than the OpenType lookup tables,
but it does have some bugs that annoyed me. I’ll comment about this approach in the article.
3. Designing Glyphs
A glyph is “an image, often associated with one or several characters” according to the FontForge
glossary. The first step is to design such images that will compose your font. In order to do this, there’s
a lot of information on the internet that is easily accessible. You can even use FontStruct to do it,
depending of how simple the glyphs are. In my case I used Inkscape. As it works directly with SVG (a
vector graphics image format) and FontForge can import those directly, it’s a straightforward process.
1
My recommendation is to create an image of 1000×1000 pixels
(or 1024×1024 if you intend to create a TrueType font, as it requires
the height to be a power of two, though FontForge is able to re-scale
it if you want). The width is not really important, because it’s defined
per glyph, but the height is defined for the font (unless you have a
vertical system, then switch “width” and “height” in this paper).
Create a base file with all the guides, especially the baseline, and use
that file as a starting point for each glyph. Save each glyph as
separate file.
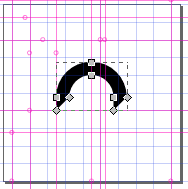
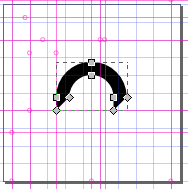
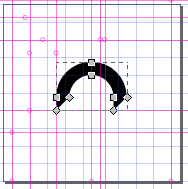
When finished with a glyph, select all the pieces, do an Invert
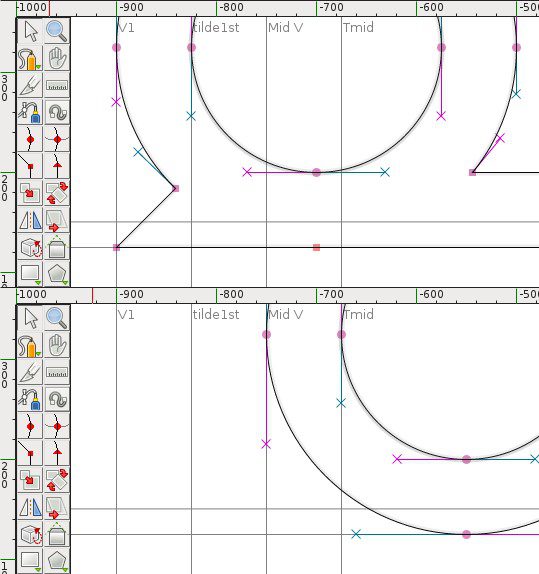
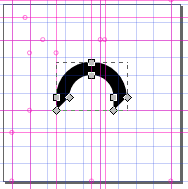
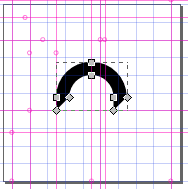
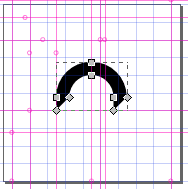
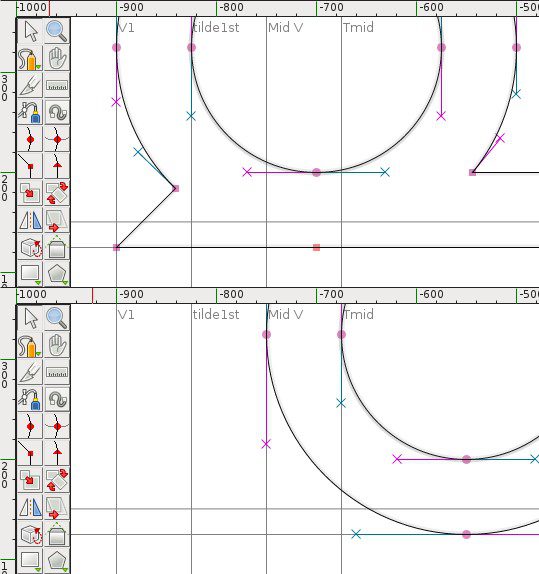
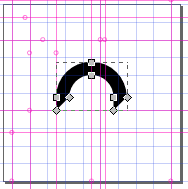
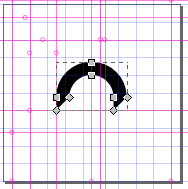
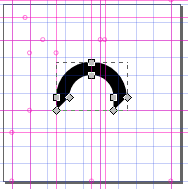
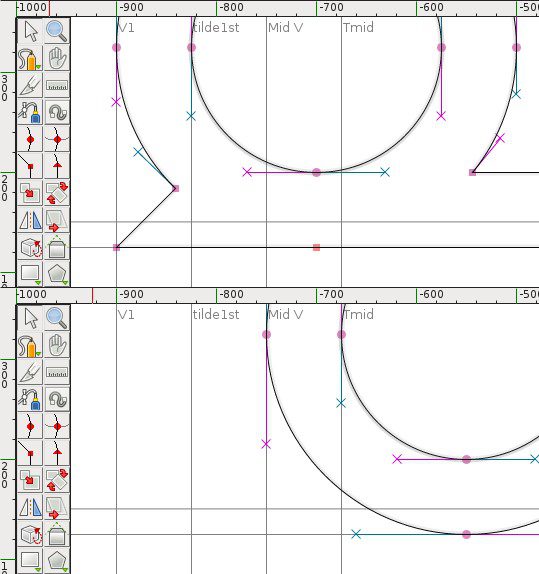
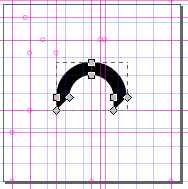
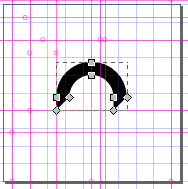
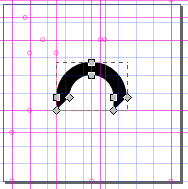
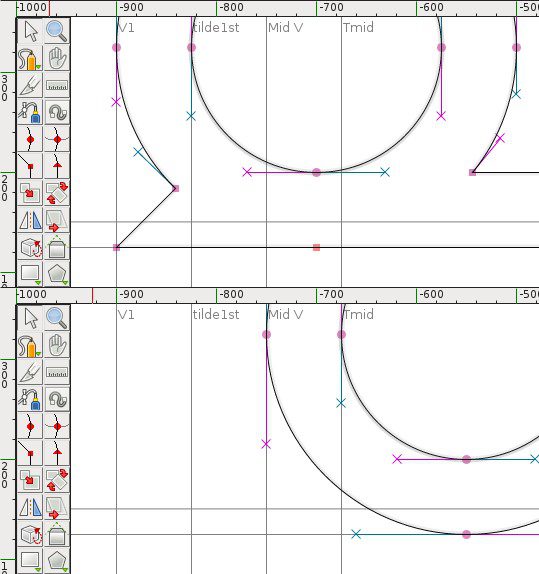
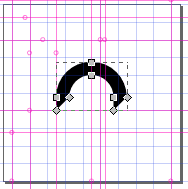
Picture 1: The design for
short i in Inkscape.
Selection command and delete. This assures nothing extra is hanging around (like a wayward stroke or
an empty path). Then, select the tool Edit paths by nodes (F2), hold shift and click on every piece until
all is selected. Then click on Path > Union in menu bar to make it all a single path. FontForge requires
that only a single path exists.
4. Importing Glyphs
4.1. Creating a new font
Open FontForge and create a new file. It’ll show a bunch of rectangles with red Xs and characters on
top of them. The Xs are where your glyphs will be, and the characters are a reference for the correct
encoding.
You also have to set the baseline of the font. The baseline is the horizontal line on which letters sit.
Everything below the baseline is a descender, like the stem of the letter p. In Xiis, all final consonants
are drawn below the baseline.
To set the baseline, go to Element > Font Info (Ctrl+Shift+F) > General. There you can set the
Ascent (the size above the baseline) and the Descent (the size below the baseline). The Em Size changes
automatically to reflect the sum of the two and that should be the same height of your SVG files, to
ensure the glyphs will be in the same position when importing.
In the Font Info dialog, under the PS Names section, you can set the name of your font and also add
a copyright notice.
4.2. About encoding and character sets
A character set is, well, a set of characters. The encoding is what tells which bytes represent each
character of a set. Unicode is an example of a character set, as a collection of characters and a standard
numeric order for them. In order for the computer to understand which character to use from a set, an
2
encoding is necessary, such as UTF-8, which maps a byte (or a sequence of bytes) to the numeric order
in the set.
Every character in a set must have a numeric ID, but the encoding doesn’t really need to map all of
the characters. For example, a long s might be used when an s occurs in initial or medial position, but it
doesn’t have to be mapped to any byte, as it’ll use the same as s does. To the computer, they’re the
same, even though the representation is different.
So, when creating variations of characters, you don’t have to specify the encoding for all of them,
just for the base form.
For Xiis, I used some of very special characters of Unicode, like ṕ (p with acute) and ẽ (e with tilde),
so I used the full BMP (Basic Multilingual Plane). To do that in FontForge, click on the menu
Encoding > Reencode > ISO-10646-1 (Unicode, BMP). This will bring a lot of characters to the
FontForge screen. For easier navigation, the View > Goto (Ctrl+Shift+>) command can be used.
4.3. Importing Glyphs
Now you have to import the glyphs under the characters you want to use when typing. Just the base
forms should be imported this way, as alternative forms don’t need to have an encoding. In the case of
Xiis, those are initial consonants, vowels in their standard position, numbers, and punctuation marks.
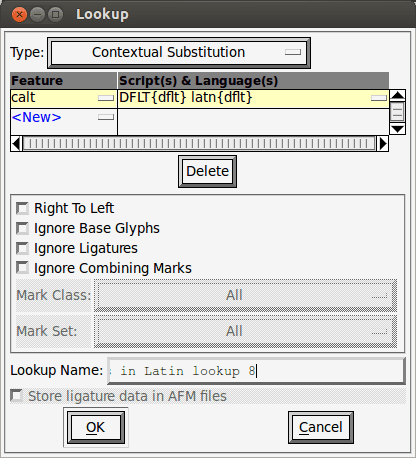
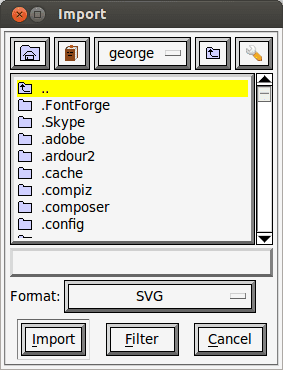
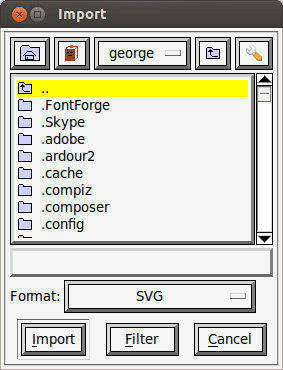
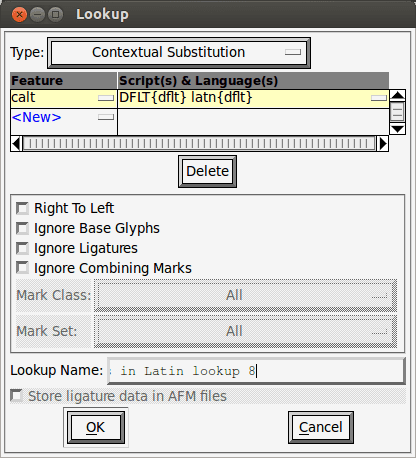
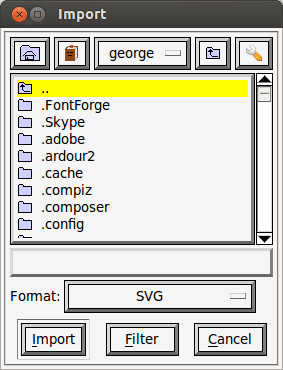
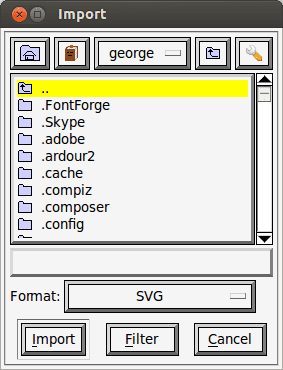
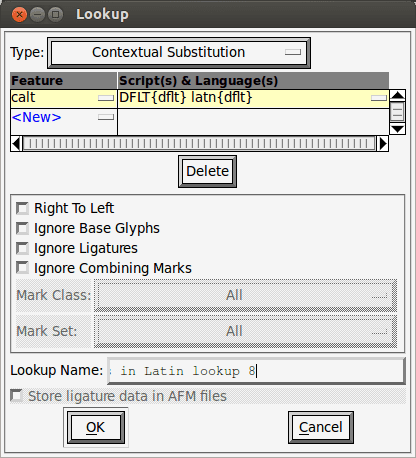
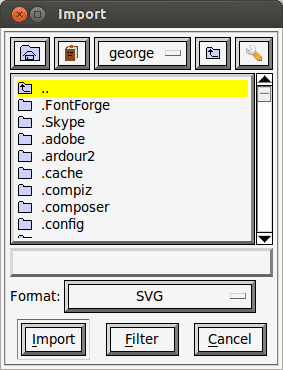
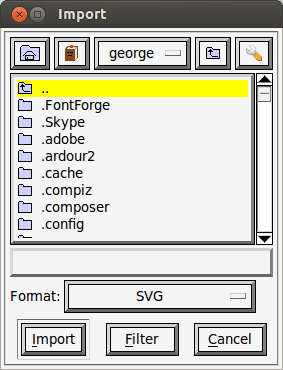
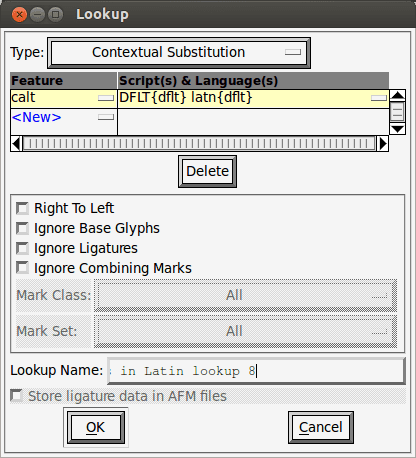
If you double click any red X, it opens the Glyph Edit
window. FontForge provides tools to design the glyphs
inside it, but I find Inkscape much more powerful and
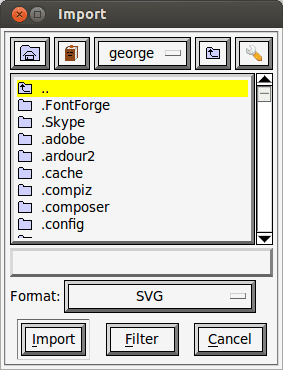
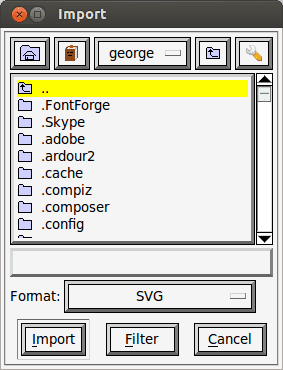
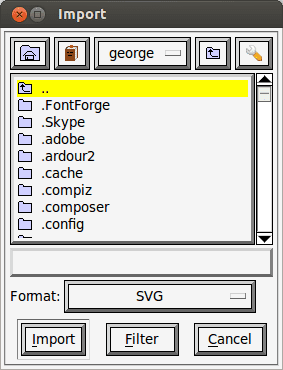
user-friendly. To import a file, go to File > Import
(Ctrl+Shift+I). Select the format as SVG and find the file
with the corresponding glyph.
If you set the Em Size correctly, the glyph should
already be in the right position. If not, select all and
move it around. The keyboard arrow keys can be used to
move pixel by pixel. With
pixels per step.
After adding all the base forms, click on Encoding >
Compact. This will make only the non-empty characters
appear. This make it easier to navigate, especially if you
used any special character that appears far down in the
list. Just remember to uncheck it before exporting, or the
encode will be messed up in the font. The other reason to
compact is that the extra glyphs will be at the end of the list, which is a far way to scroll if you’re using
Picture 2: The import dialog.
3
the BMP. Even though you can just press the
together instead of jumping around.
Now, you have to rename your glyphs to something meaningful. These names are useful when
building the lookup tables later. You can use the standard names, which are already set, or change to
something more specific. To do that, select a glyph and click on Element > Glyph Info
(Ctrl+Alt+Shift+I). Go to the section Unicode and change (if you want) the Glyph Name field. You can
use the Prev and Next buttons to navigate between glyphs, as long as you remember to click OK after
you finish editing, because if you Cancel it, all the changes will be canceled, not just the current glyph.
For the alternative glyphs, you need to create new slots. Click on Encoding > Add Encoding Slots.
Select the needed amount of slots and click OK. Then you can import the glyphs for alternative forms
into the new slots.
4.3.1.Zero-width Characters
Vowels in Xiis don’t require any special feature to be placed correctly. I just used an “evil” trick:
zero-width characters.
I placed the vowels before the origin (i.e. before the position marked as 0 in the ruler), so they show
in the correct position inside the previous consonant. Then I moved the line at the end to the same point
of the origin. It’s also possible to use the Metrics > Set Width (Ctrl+Shift+L) command to do that. With
zero-width, the cursor won’t move forward when typing this character. And since the glyph is before
the start line, it’ll be drawn before the cursor.
If you use mark positioning (usually done with diacritics), you would also want to make them zero-
width, otherwise some unwanted extra space may be generated.
4.3.2.References
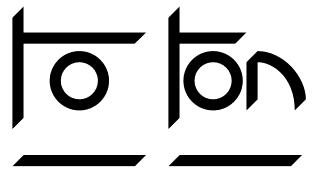
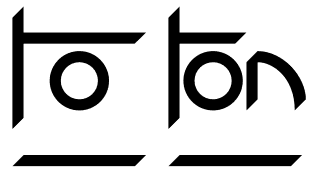
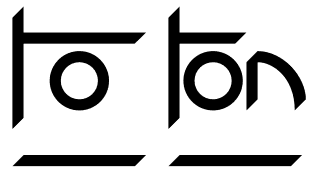
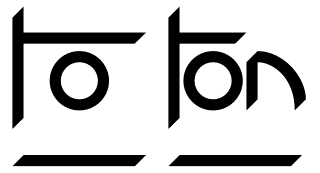
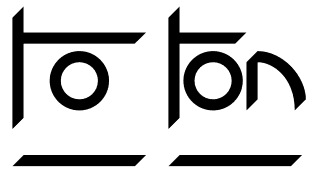
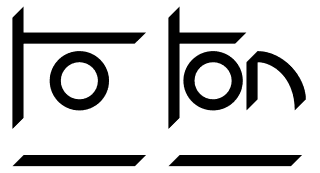
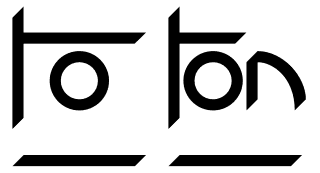
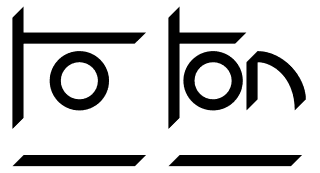
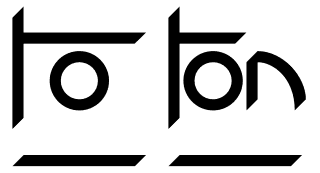
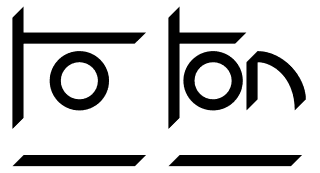
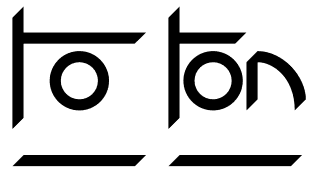
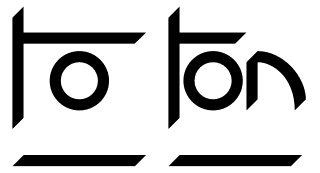
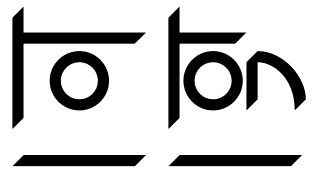
You may want to use the same glyph for the same
character in a different position. It happens in Xiis, when two
vowels occur in a syllable, as they change position but keep
the same form (see Picture 3). You can copy and paste and
then just adjust the position of the alternative form, which is
possible. However, if you want to change the form, you have
to copy and paste and adjust everything again.
That’s when references come into play. Instead of copying
a glyph, you can just copy a reference to it. Then if you
change the original, all references will be updated.
4
Picture 3: Example of how vowel
position changes when there are two in
a syllable.
To do that, click with the right button in the source glyph and click Copy Reference. Then you can
paste it into another and only the reference will be copied. It’s not possible to edit the pasted reference
—you can only change its position. Be aware, though: if you change the position of the original glyph,
all references will reflect the relative movement.
4.3.3.About Suffixes in the Glyph Name
When placing alternative forms of characters, you want them to have the same name as the base
form, which makes sense. But the names must be unique. And that’s when suffixes are useful. When
you change the name of the new form, place the name of the character, add a dot (.) and then type a
meaningful suffix.
Using the same suffix for multiple characters helps automatizing the creation of substitution tables
later, as FontForge can find all terms with a certain suffix. You can also chain the suffix, though the
software automation only happens with the last suffix.
In Xiis, I created variations with different positions for when a vowel is the first sound in a syllable
and when it is the second. Both are different from the base form, which is centralized. So I used the
suffixes “first” and “second” for that. When I created the substitution table, I could load everything
with the same suffix, which was very helpful, especially after I added new vowels. There’s also the
half-box version of the initial consonants, all carrying the “half” suffix. As the finals are variations of
the initials, they also have the same name, but with a “final” suffix.
5. Lookup Tables
This is the main engine that made the Xiis font possible. A lookup table is a set of commands that
informs the software rendering the font how to make the correct transformations. The tables have to be
associated with features, which are standard identification for such transformations.
Those features are part of the OpenType standard, maintained by Microsoft and Adobe. Apple fonts
work differently and follow another standard, though they are usually compatible with OpenType and
FontForge knows how to deal with them, so it shouldn’t be a problem.
5.1. Features
In the OpenType standard, features are identified with a four letter code. For example, the ligature
feature (the one that joins certain combinations of characters like “fi”) is identified by “liga”. There are
a great variety of features, though some only work with specific languages.
The trouble with features is that, as powerful as they could be, each software implements them
differently. There’s no guarantee that they’ll work (or that they’ll work the right way). But they are all
we have, so we have to figure out how to best work with them.
5
Of course, Graphite (the scripting language mentioned before) is another possibility. However, even
if it is more constant, it’s only supported by a handful of software applications. And, in my experience,
you have to choose between Graphite and OpenType features, as they don’t work together.
For Xiis, I only used the Contextual Alternate (calt) feature (which switches a glyph for another
based on the surrounding glyphs), though I used it in multiple tables1.
5.2. Lookup Tables
A lookup table is actually what instructs the transformations. There are two types of them:
substitution (GSUB) and positioning (GPOS).
The substitution table switches a glyph with another. It can also exchange many glyphs to just one,
or one to multiple glyphs. A positioning table changes the place of a glyph based on a certain context
(kerning is one example of that).
What it’s not immediately clear is that you can use many features with a certain table, and
sometimes you don’t need to specify a feature for a specific table as you’ll use it somewhere else. For
example, if you want to change a glyph based on context, first you need a Single Substitution table to
describe such changes, then you need a Contextual Substitution to describe the context in which the
change should occur. Only that second table needs to be associated to a feature.
5.3. Subtables
A lookup table actually only contains metadata about the transformations. The real description of
how they should occur is placed under subtables.
The format of those subtables varies depending on the lookup, and you can check the documentation
of FontForge to understand how the dialog works. I’ll focus in the ones that I actually used.
5.4. Tables of Xiis
There are three transformations in Xiis: the half-box, the vowels and the final version. The first thing
is to understand when such changes happen. The half-box version occurs when an initial consonant is
followed by two vowels. The vowels change positions when there are two in a syllable: the first is
backed a little and the second is nudged forward. The final version occurs when a consonant is
preceded by a vowel.
While that’s not how I would describe this if I were talking about the writing system itself, it is the
sort of “programmer’s talk” that tells how the computer should look at those in a consistent manner.
1 A list of all the features can be found at the OpenType specification. And there’s a great article about features that can
be found at http://ilovetypography.com/OpenType/opentype-features.html.
6
5.4.1.Vowels
Let’s handle the vowels first. I created glyphs with the variations for first and second position and
used a table to handle. It was also possible (though I didn’t know how at that time) to create a
positioning lookup table to nudge them.
First, create a new lookup table under Element > Font Info (Ctrl+Shift+F) > Lookups > Add Lookup
and select the Single Substitution type. There’s no feature needed for this one. Name it (I used “First
vowel” as a name) and click OK. Next, select it and click Add Subtable. You can use the default name.
That’s when suffixes come into use. Since I named all first versions with the same name plus a
“first” suffix, it’s possible to use the Default Using Suffix button. Just fill the field near it with “first”
then click the button. The list will be filled automatically (though you may want to check if it’s all
there, as you might have misspelled something). To understand this subtable, the first column is the
original glyph, and the second column is the glyph which will take the place of the original. This table
will not make any actual change in the way it is, because the lookup is not associated to any feature.
Then, make another lookup and subtable similar to
these, but this time using “second” as the suffix.
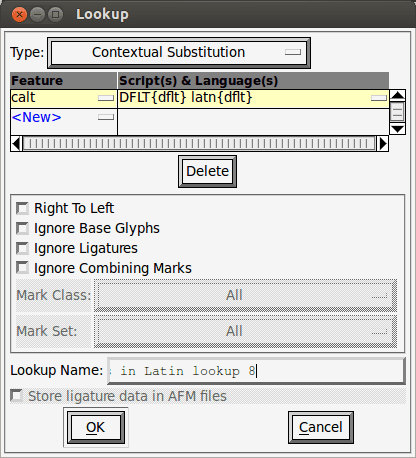
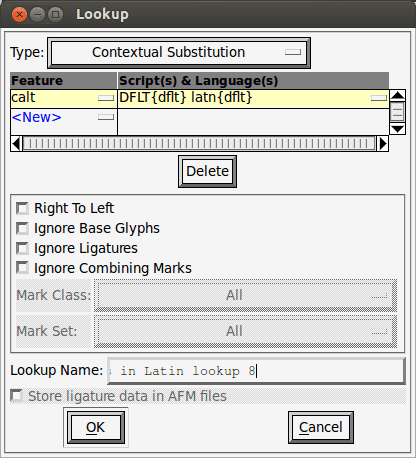
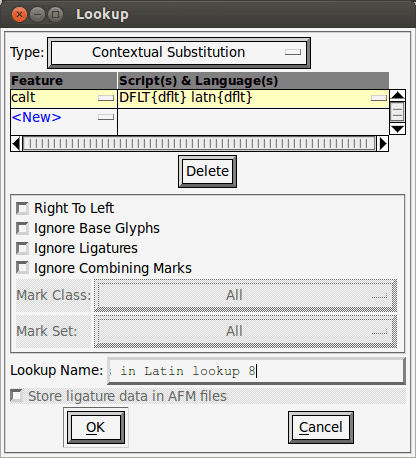
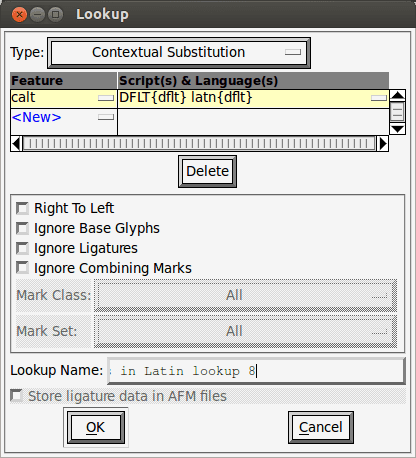
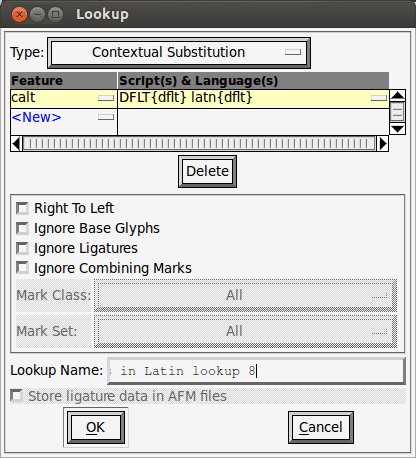
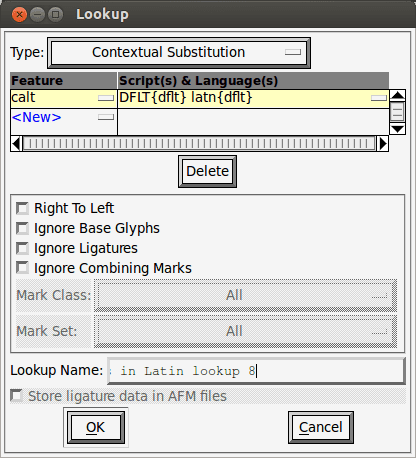
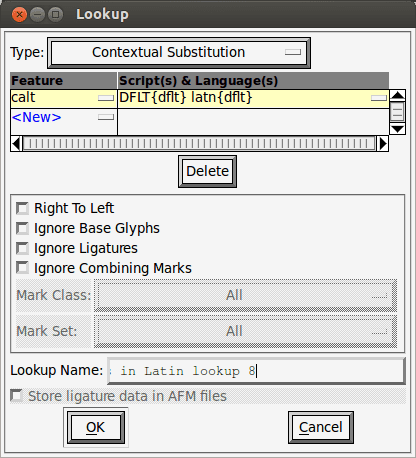
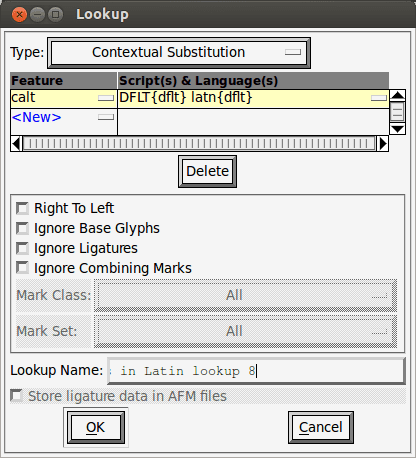
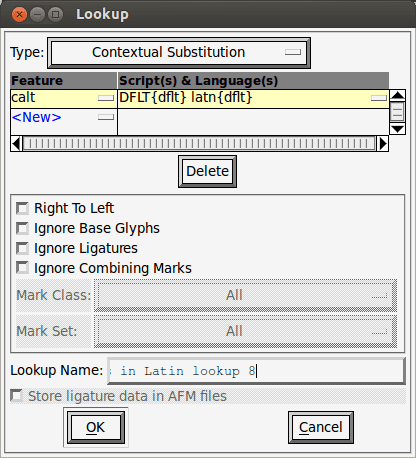
Now, make yet another lookup, with the type
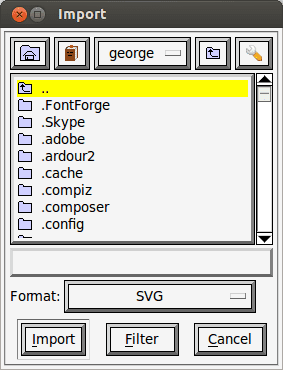
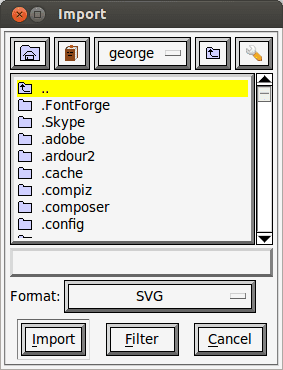
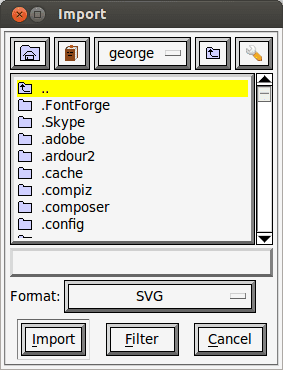
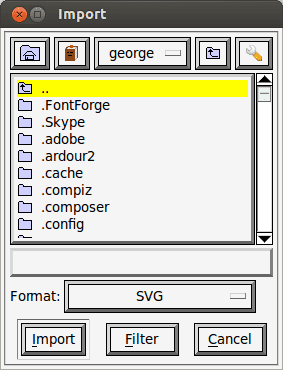
Contextual Substitution. In the feature column, notice
there’s a small rectangle after the word
on it, a list of features will show up, and then you can
select Contextual Alternates. A “calt” feature will be
added. In the Scripts & Languages column you can
select in which scripts this feature should be applied.
“DFLT” is short for “default” and should be set for
conscripts. Between the curly brackets is a list of
languages to apply the feature. Usually, “dflt” (default)
is enough. Click OK to save the lookup (I used the name
“‘calt’ Vowel places”, as it is default to start the name
with the feature it uses, though not required).
It’s possible to use a Contextual Chaining
Picture 4: New lookup table with ‘calt’
feature.
Substitution. The main difference from a Contextual Substitution is that it separates the glyph(s) you’re
going to change from its context. That lookup allows you to create three sections: before the glyph(s)
(called backtracking), the glyph(s) and after the glyph(s) (called lookahead). This format is more
general, and it’s only needed if you want the text processor to treat the changed part differently (which
makes more sense in positioning tables).
7
Add a subtable to it and use the default name. A prompt then shows up, asking if you want to edit By
Glyphs, By Classes or By Coverage. With the first, you have to define the context rule glyph by glyph.
In the case of Xiis, it means adding every combination of vowels (and order matters). If you use
classes, you can make lists of glyphs (which are called classes, hence the name) and create rules for a
position that matches any of the glyphs inside such classes. The coverage format lets you create a
separate list of glyphs for each of the glyph positions. The type of dialog can be Simple or Complex. I
prefer the Simple format and you can do the same thing in both of them (the Complex format is just
more verbose).
And by “positions” here I mean the positions of a glyph in a sequence of glyphs. In this case, I’m
thinking in a sequence of vowels. This determines the context in which to apply the transformations.
You make this context with rules. Each subtable can contain many rules, but, according to FontForge
documentation, “OpenType interpreters do not seem to support multiple rules within a single subtable”.
If needed, multiple subtables can be created.
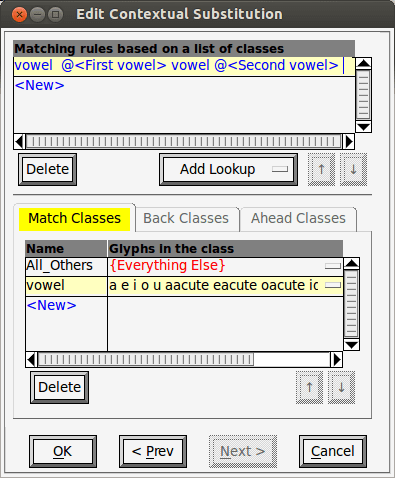
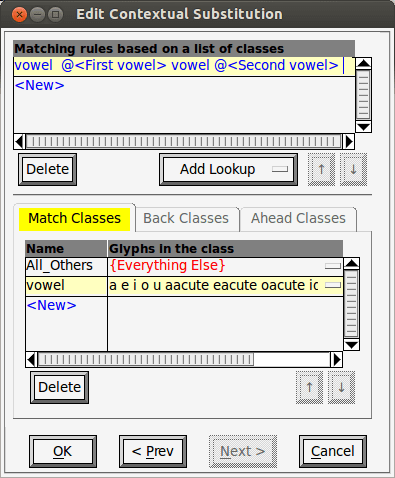
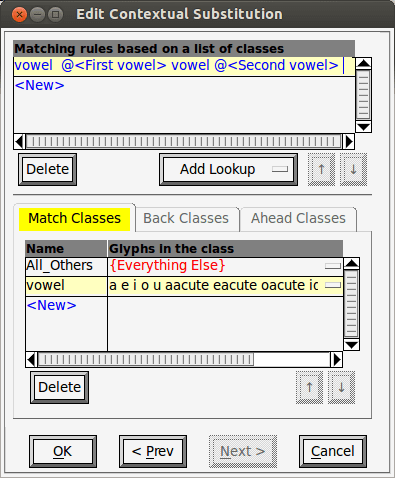
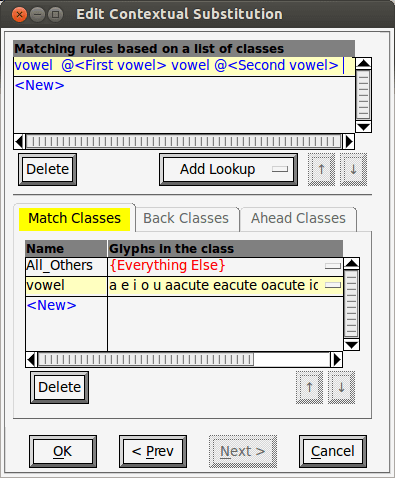
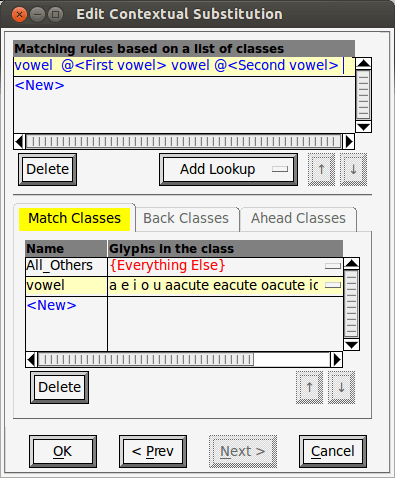
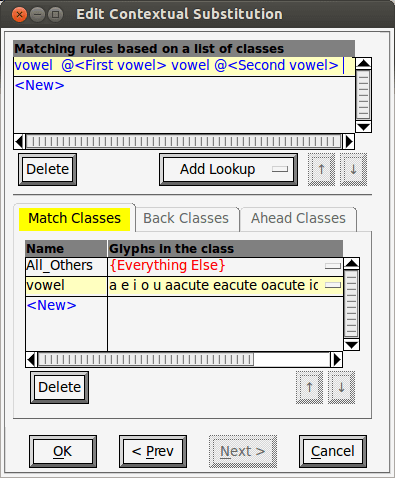
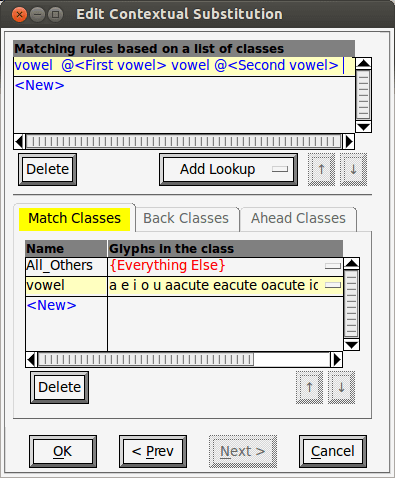
Moving on, select By Classes and Simple (the default) and click on Next. First, we’ll define classes
in the Match Classes section. A special class name “All_Other” is already there and cannot be deleted.
It means “everything that is not defined in a class”, which can be useful in some sort of “everything
except” rule.
Click on
change the name to “vowel”. In the second column,
put all the glyphs that are vowels separated by
spaces. When you start typing, a list of possibilities
will show up. You can select it with up and down
arrow keys and use the right arrow key to insert the
selected.
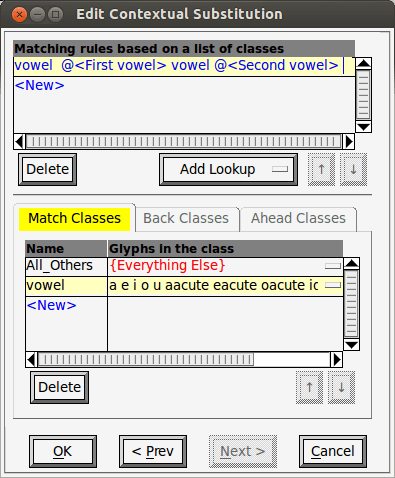
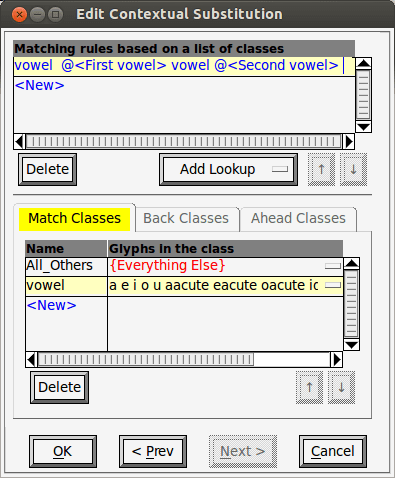
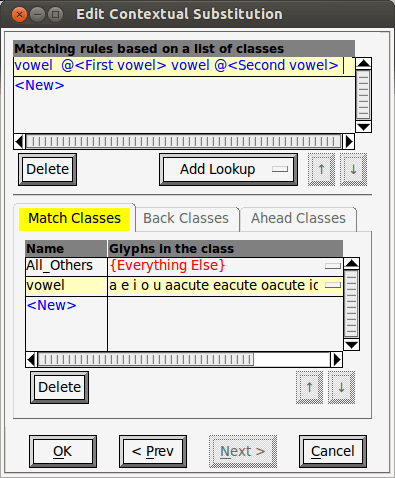
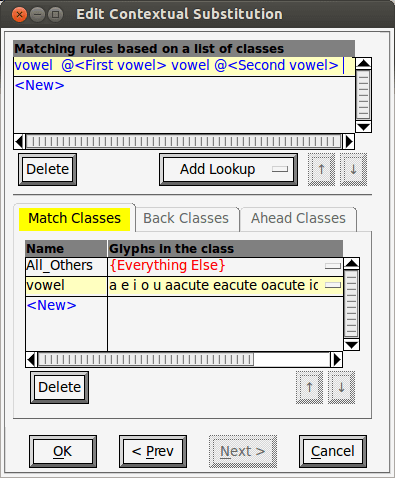
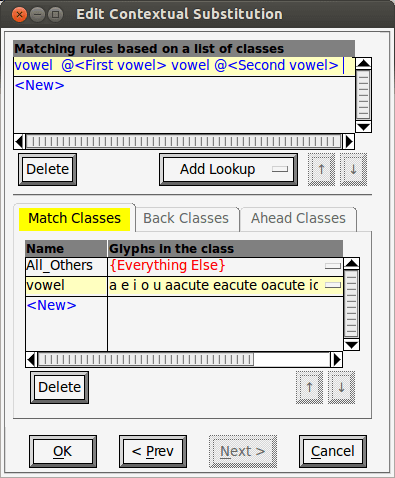
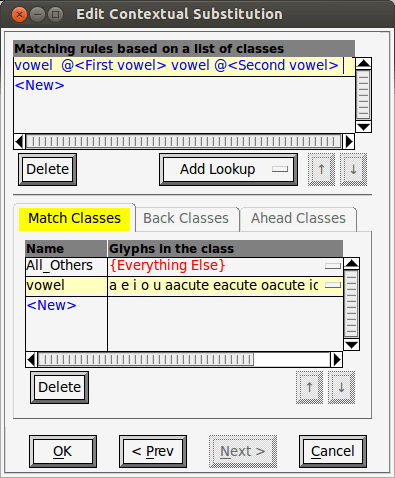
Then create a rule by clicking on
Matching Rules section. Type “vowel” (it’ll probably
auto-complete, and you can press the right arrow key
to accept it). Next, click on the Add Lookup button
and select First vowel in the list, which is the first
lookup table we made. Then type “vowel” again and
add a lookup again, but this time select Second vowel
(or any name you gave to the second lookup table).
The result will be similar to Picture 5.
What this rule means is that if any of the glyphs
present in vowel class is followed by any of the
glyphs present in vowel class, it will apply the lookup First vowel to the first glyph and apply the
Picture 5: Contextual substitution subtable by
classes.
8
lookup Second vowel to the second glyph. Any space in the rule is ignored. If you want to match the
space glyph, use its name (“space”), though in this case you would need to put it in a class.
Since the only difference between a vowel and its first and second versions is the horizontal
position, it’s possible to avoid the creation of the extra repeated glyphs and, instead, use a positioning
lookup table. I’ll describe this approach here.
First, create a GPOS lookup of the type Single Position. You may think of creating a Pair Position
(kerning) in this case, because there is a pair of glyphs (two vowels), but that can only change the
position of the second glyph and we want to change the position of both. So we make two lookups of
the type Single Position, one for the first vowel and another for the second, with a single subtable for
each of the lookups.
The first vowel must be backed by 150 units in the horizontal axis, so we change the Δx column to
“-150” (notice it is negative, so it means 150 units to the left, since this is left-to-right writing system).
In the Base Glyph Name column, add the name of the first vowel, then click in
as needed until all the vowels have a place. It’s good to change the position first, because the new lines
will use that position as default.
For the subtable of the second lookup you do the
same, only changing the Δx to “325”, which is the
difference to a second vowel.
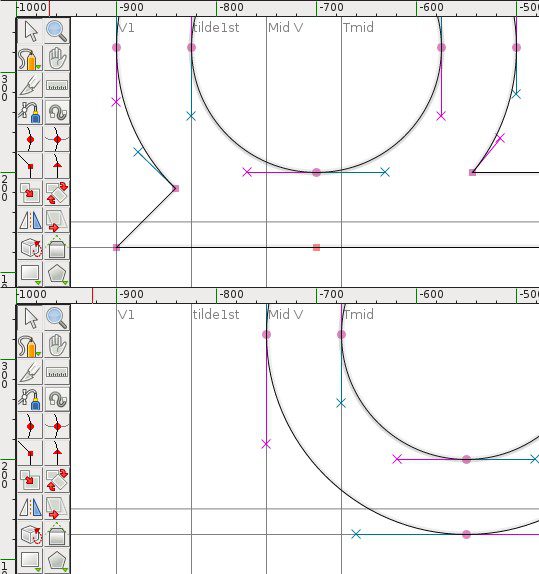
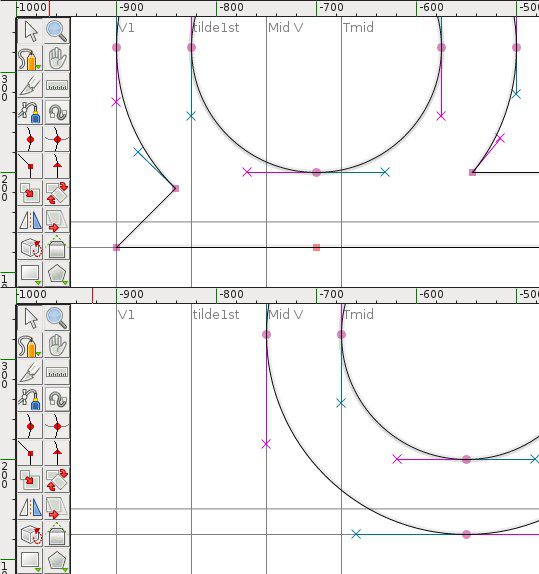
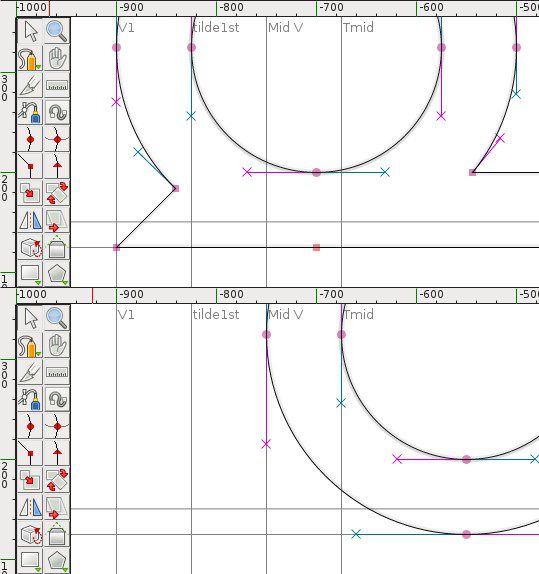
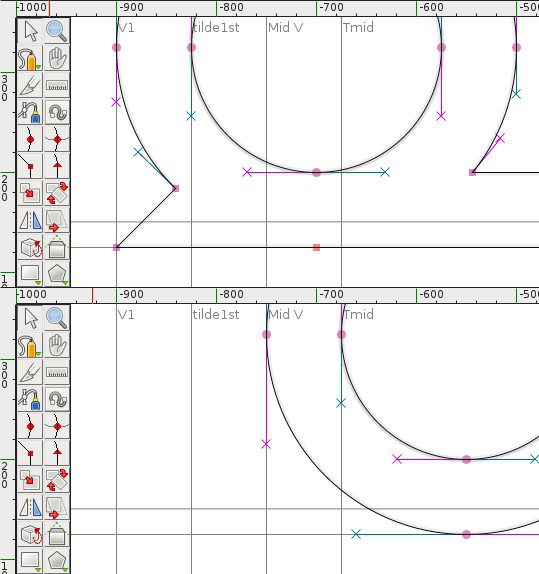
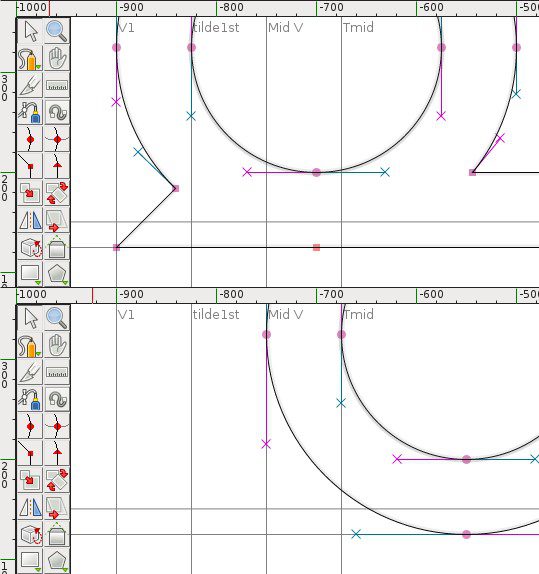
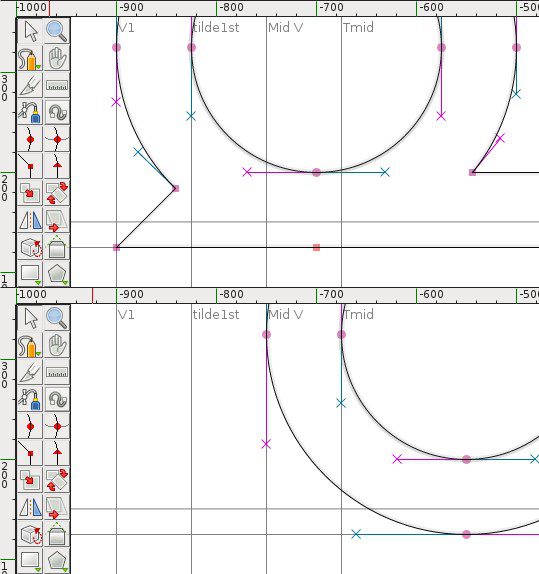
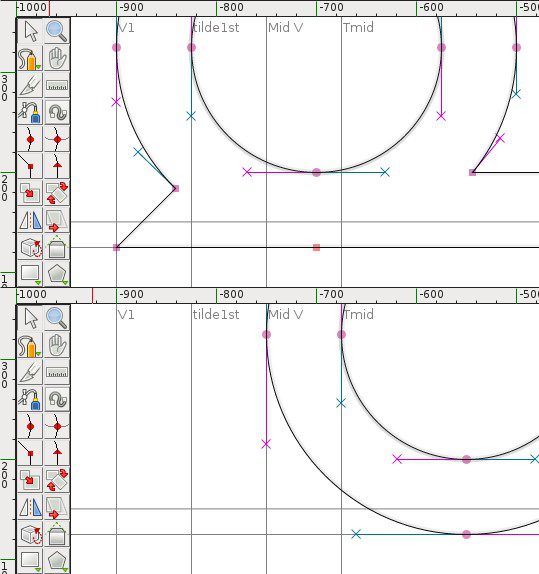
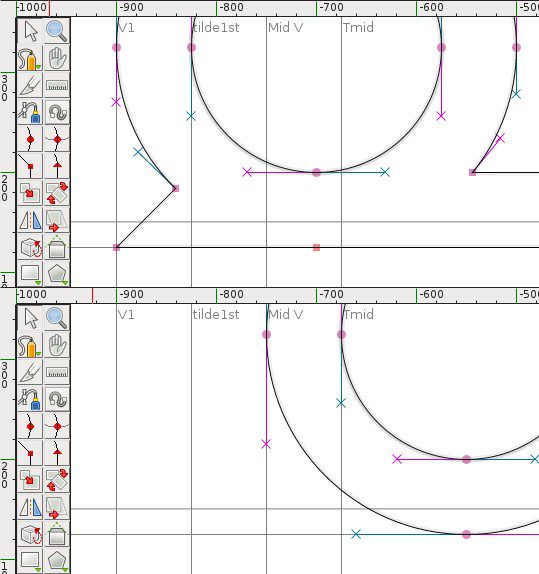
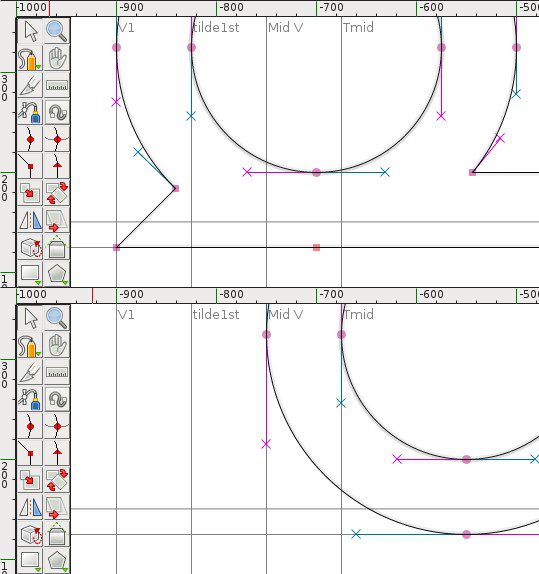
The only caveat here is that long vowels are
placed always on the position where the first vowel
would sit in diphthong, instead of the middle
position that occurs with short vowels (see Picture
6). So, for those, the first Δx would be “0” and the
second would be “475”. It’s possible to not even list
them in the first table, which can save some work.
After that, a Contextual Position lookup is
needed, with the Horizontal Kerning (kern) feature.
The approach here is the same as the Contextual
Substitution, using a class of all the vowels and a
rule like “vowel @
@
two
consecutive vowels according to the lookups we
made before.
This positions
9
Picture 6: Difference of position between a long
vowel (top) and a short vowel (bottom).
5.4.2.Half-boxes
The half-box version of an initial consonant should be used when it’s followed by two vowels. To do
that, we need to specify such a context, which would be consonant vowel vowel. However, I’ll
use a neat trick to simplify that.
First things first, we need a lookup table that can handle the substitution. So, create another lookup
with the type Single Substitution and name it “Half box”. Add a subtable with the default name and use
the Default Using Suffix with the “half” suffix. This will fill the table, and you can press OK.
Create another Contextual Substitution lookup and add the Contextual Alternates (calt) feature.
Name it “‘calt’ Half boxes” and click OK. Add a subtable to it with the default name.
Now comes the trick. Since every two vowels will be replaced by a first version and second version,
instead of checking if there are two vowels after the consonant, the table can check if the consonant is
followed by any first vowel. To do that, create a class with all the consonants (let’s call it “consonant”)
and another with all the vowels with the suffix “first” (call it “first”). Then, add a rule like:
“consonant @
by any vowel in the first class the Half box lookup will be applied. In this case that means a consonant
will be traded by its half version when followed by a first vowel (notice that this trick is not possible if
you use the positioning approach for vowels, in such case you could use the consonant vowel
vowel rule to match this case).
From that you can perceive two things. First, you have to consider previous transformations. If
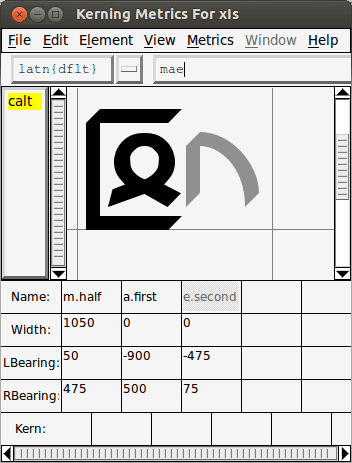
you forget them, it will not work as intended. For example, if I type the combination “m a e”, which is
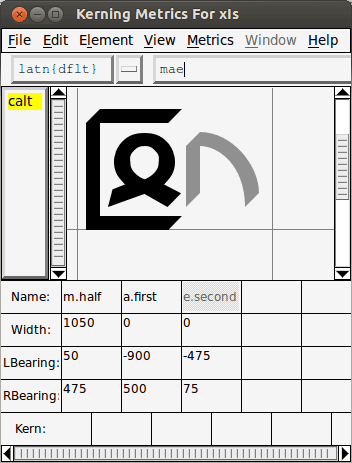
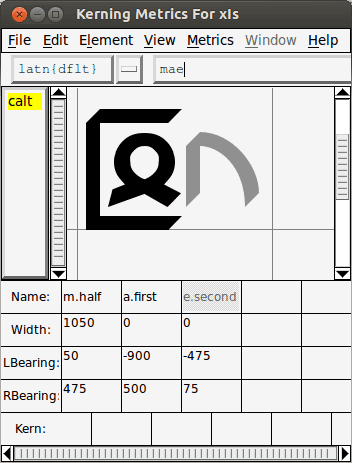
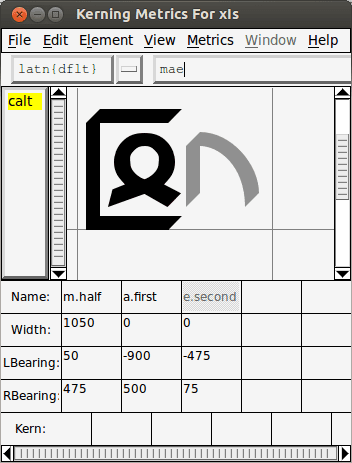
a consonant followed by two vowels, I have to remember that they it will be changed to “m a.first
e.second” and if I don’t explicitly specify those in the classes, it won’t match. So the glyph “a” inside
a class will not match “a.first” nor “a.second”. If you want those, you have to add them to the class.
Second, the order of the lookups matter. If you put the “‘calt’ Half boxes” lookup before the
“‘calt’ Vowel places”, this trick will not work, because it’ll be looking for a consonant followed by a
first vowel, and the vowel wasn’t yet changed to a first. You could use this order if you wanted to avoid
the trick, so you could specify a single class of vowels and match “consonant vowel vowel”,
me first and second, because that would only
without having to worry that they would beco
happen later.
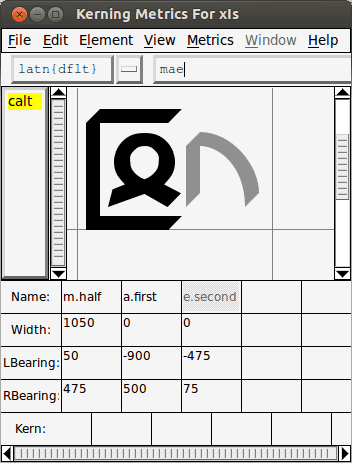
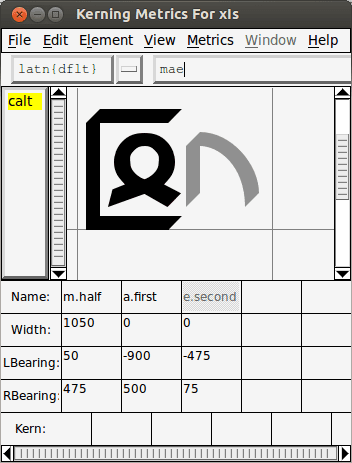
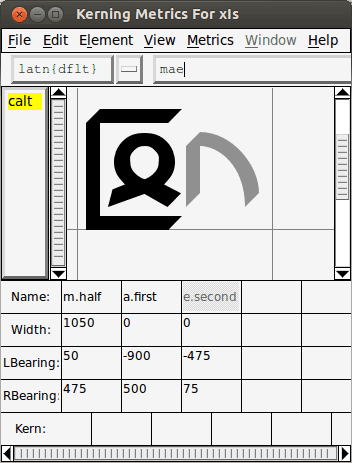
5.4.3.Testing it
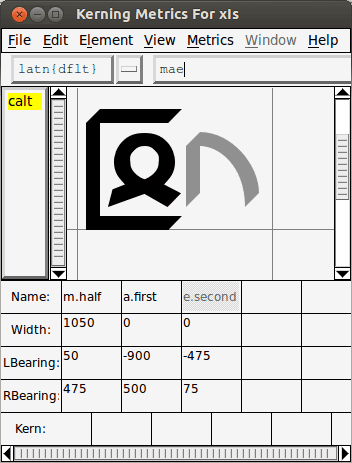
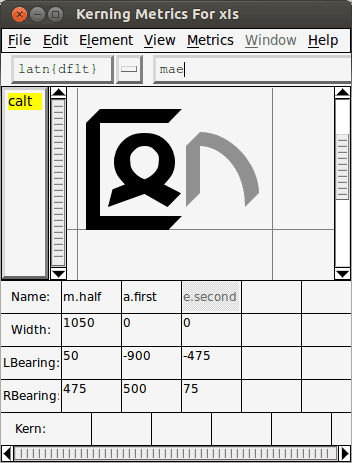
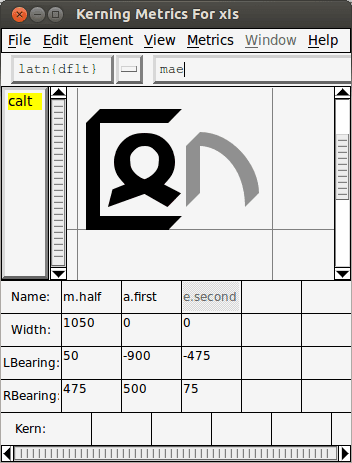
You probably want to know if the transformations are working as expected. That can be done by
clicking on Window > New Metrics Window (Ctrl+K). In the text field at the top you can type anything
and it’ll be rendered in the middle of the window.
10
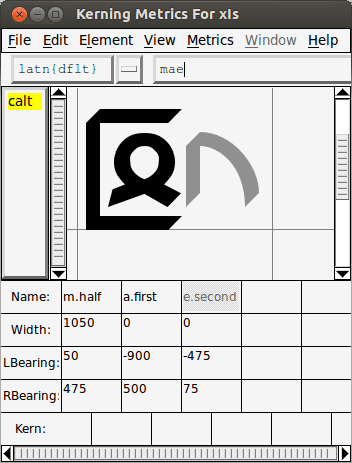
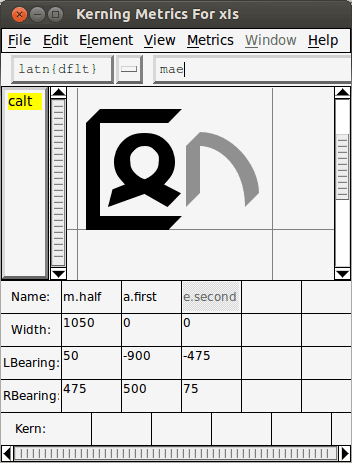
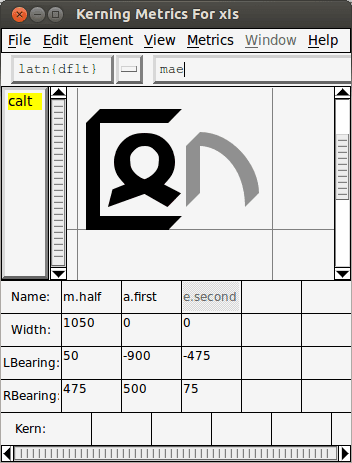
Info about the glyphs can be found at the bottom, so you
can see that the glyphs are being substituted correctly. You
can also select different scripts and languages in the left field.
The New Lookup Subtable command here can only create
positioning tables and not substitution ones.
5.4.4.Final Consonants
The final consonants are variants of initial ones (at least
for typing). They change to the final form when preceded by
a vowel. This way, it’s not possible to type two finals in a
row, and that’s what I want.
Following the same process, create a Single Substitution
lookup called “To final”, add a subtable and fill it using the
suffix “final”. Then add a Contextual Substitution lookup and
a subtable to it.
Picture 7: Metrics for “m a e”
sequence.
The thing to remember when defining the classes is that the vowels may be in their second version,
so you have to add them to the list (it’s not possible that they are in the first form, because it only
happens when they are followed directly by another vowel, so there wouldn’t be any consonant
between the two).
So, there’s a class of “finals” and another for “vowels” (which includes the seconds). And the rule is
“vowels finals @
transformed according to the “To final” lookup.
And that completes everything.
6. Exporting
First, it’s good to validate the font and see if there are any problems. FontForge can still export the
font if any of such problems occurs, but it can also fix some of them if you want, like “Missing
Extrema” and “Non-integral Coordinates”. Some of the errors go away if you fix others.
To do that, click on Element > Validation > Validate. A dialog showing all the errors will appear and
if you double click on one of them the glyph will open and a message will show up explaining the
error. It’s possible that such message box has a Fix button, which will fix it and move to the next error.
FontForge saves the files in its own format (.sfd). To generate a font file that can be installed, click
File > Generate Fonts (Ctrl+Shift+G). There you can select the format (there are plenty) and the place
11
and name to save it. The most common formats would be OpenType (CFF) and TrueType, as both of
these support the lookup tables and work on most platforms.
7. Other Approaches
7.1. Composition
One possibility for Xiis that I considered is to pre-compose all possible syllables and create
substitution tables for the sequences. While this task may seem daunting, I could do with a script
program. FontForge accepts scripts in its own language and also in Python. If you are a programmer
like me, this possibility is not so daunting.
For that, a Ligature Substitution lookup may be used. This kind of lookup replaces a sequence of
glyphs with a single glyph. Instead of using the Standard Ligatures (liga) feature, in this case it’s
proper to use the Glyph Composition / Decomposition (ccmp).
If this interests you, the FontForge website has the API documentation for the scripting library both
in Python and in its own language.
Note that I gave up on that approach for Xiis. While possible, there are so many combinations for
compositions that the font file ended up many times larger than the original. Just note that you can mix
compositions with the lookup tables magic that I described in this article (Hangul fonts seems to do a
bit of that too).
7.2. Graphite
Graphite is a system made specifically to deal with complexities of lesser-known languages. It was
created by the Summer Institute of Linguistics (which also provides many other linguistics-related tools
that can be used in the conlanging universe). You can’t design the glyphs of a font with it—that should
be made elsewhere—only the extra features can be made, like position and substitution.
There are two main problems with Graphite: it is supported only by a handful of programs (while
OpenType is widely supported) and it requires to be written like a programming language, which might
not be for everyone (though it is somewhat simple to understand, at least not harder than lookup
subtables and features).
The rules in Graphite are made in a different way than OpenType lookup tables. It makes them more
general and a little simpler, while still allowing powerful possibilities.
Depending on your affinity with a programming language and the complexity of your writing
system, it might be even easier to follow this approach instead of the lookup tables. And notice that the
two systems cannot be used together, because the graphite compiler wipes the tables of the font and I’m
sure the same occurs in the opposite direction.
12
7.3. Anchors
While substitution and kerning worked fine for Xiis, other systems might need mark positioning.
This is probably the best way for combinations of diacritics and abujidas.
The general idea is that you place an anchor on the base character, another anchor of the same class
in the diacritic and when combined those anchors will be put together like a pin. This way you can have
many base glyphs and many diacritics without having to create a lot of alternate glyphs with the
combinations2.
8. Final Thoughts
These advanced typographical topics are really hard to learn and there is little documentation from
them. It’s hard enough to find a cheap program to make a simple font, much less a complex one.
Luckily, FontForge is freely available and works well.
If your budget is large, other applications may be used to design the font with all the features, like
Fontographer and Glyphs (the latter is for Mac only). They have an easier approach on the lookup
tables, as far as I know.
I hope people can understand the general procedure to make the lookups and features. It’s hard to
make a one-size-fits-all kind of tutorial and there are many possibilities I didn’t test myself. For me, it
was hard to understand how it worked but once I did, the rest was easy. Once you master that, I’m sure
you can do pretty much anything you want (besides perhaps non-linear writing systems).
2 A step-by-step tutorial showing how to make and use anchors is described in the following link:
https://github.com/fontforge/fontforge/wiki/How-To-Create-Anchors.
13

